| Episode
112 - Weekend Guests |
|
Gamesboard |
|
This project was conceived on the premise of using left-over latex
wall paints and materials readily found around the home or at the
neighbour’s. We chose two complimentary colours of paint, those
used on the set of Savoir Faire. This project was created by artist
Brent McDougall.
- We used as the base of our board a sheet of 2 foot by 2 foot
(1/4 inch) MDF. MDF is a wood-based product available at most
lumber and home supply centres. Often it is cut into 2 foot
by 4 foot pieces. Most places will cut this in two for you and
then you’ll have the makings for two games boards.
- MDF is made to be very smooth so after a minimal amount of
sanding along the edges (the cut edges can be rather sharp)
we painted the board with two coats of our base colour.
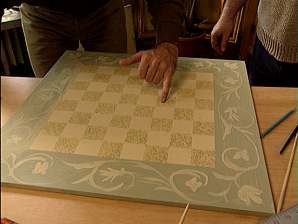
- Since a games board has a play area of eight squares by eight
squares and we wanted a nice border to decorate, we chose 2
inches as the size of our squares. That left us with a 16 square
inch play area and a four inch border. Using a ruler we measured
on the board where the corners of the play area would be, (4
inches from each side) and marked those four corners with a
pencil.
- We need to apply a frisket, or mask to the play area so we
can easily create our squares. A frisket is a thin adhesive
plastic film (MacTac works well) that we can cut into a 16 inch
by 16 inch square and lay over the play area. We peeled off
the paper backing of our “frisket” and placed it carefully onto
the area we had delineated as the play area.
- This is the time to begin decorating the border. We wanted
the border to look like it was put together like a picture frame,
so we need the corners to meet with a nice straight line. We
want to mask off the two opposing sides of the board and paint
them first. Run the inside tape edge (the tape should be low-tack,
same you use painting a room) from the corner of the play area
to the corner of the board and watch to make sure you mask carefully.
- The corner is painted in a second colour in a messy, streaked
manner. Don’t use too much paint; make sure it’s very streaky.
When done, pull off the masking tape. When this paint is dry,
mask over it and paint the remaining two sides of the border
in the same, streaky manner.
- The mask or “frisket” was then measured and marked into 64
(8 X 8) squares. We carefully cut along our lines (not too deeply,
so as to avoid scoring the paint underneath) and we removed
alternate squares of the frisket. Our board looks like it’s
becoming a games board at this point.
- These exposed squares need to be painted. Time for your rubber
gloves! First, run masking tape along the edge of the play area
to protect the painted border. Tone in the exposed squares by
blotching on some of your second colour. Use a paper plate or
an old plate and a bag or sponge. Put a little paint onto your
plate, run a little paint onto your crumpled bag and dab the
paint all over the exposed squares. Keep your texture open and
light.
- Pull the remaining “frisket” squares off the board.
- Now we finish decorating the border. Use the base colour to
decorate the border. We used a pattern taken from an antique
French panel, but your border could be based on a fabric pattern
you use in your room or maybe your favourite flower.
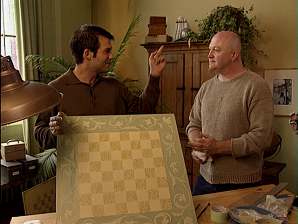
- Seal your board with a latex urethane or a spray plastic and
you’re ready to start playing games!
Courtesy: Brent McDougall, Archaeology; Toronto, ON (416) 787-6678
|